Hello lovelies!
We are so excited to share with you what’s been going on behind the scenes here at Showhome Furniture. As most of you know our family travels around and does free make-overs on different people thru-out the world.
We love giving back to our community and helping out those who need a little hand up! We feel so blessed and love to help out as a family in small ways! We are so thankful for the amazing people of Alberta who shop at our HUGE 70,000 sq. ft. store so we are able to give back.
This “farmhouse kitchen on a budget make-over” was given to a very busy mom with four little kids! She is such a sweet lady who lives on a very, very tight budget and was beyond thankful for what SHOWHOME did for her.
Here’s what the kitchen looked like before.
The transformation was amazing!!! 
Her sweet hubby painted all the cabinets and counters. We did light sage/sea foam green up top and grey tones down below with a white counter.
DIY COUNTER TOPS-FAUX STONE
STEP ONE:
For the GREEN counter we primed it with 1.2.3 BULL’S EYE white primer.
STEP TWO:
We then painted it with white porch paint.
STEP THREE:
Gather your supplies: feather, paint and sponges.
Take a sea sponge and rip it into a few pieces. We had three tones of grey latex paint and dabbed it on and wiped it off where we wanted less.
We did not want it to look sponged on so we added veins with a feather dipped in dark grey.
STEP FOUR: Make sure the veins go in different directions so they appear more realistic.
STEP FIVE: We then painted on several clear coats of satin water-based varnish.
Here’s the finished product.
DIY BACK SPLASH FAUX BRICKS
We simply took drywall spackle and put it on the wall.
Before it dried we draw in the brick design and after it dried we painted it white.Here’s what it looked like when dry.
I really wanted to give her kitchen a WOW factor so I got her hubby to paint it in light and dark grey stripes.
Then we staged up the top of the counters and mantel. We pulled in a little fabric chair and a nice green plant and stool for relaxing. We also added a big wooden clock, what’s a farmhouse kitchen without a clock 😜
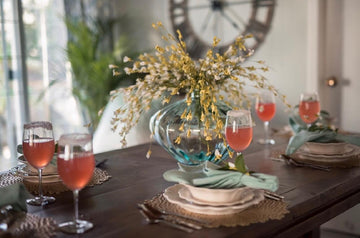
We added some bar stools for kiddies and staged up the table with beautiful china!
We ended the space with personal photos of her family in frames her hubby made! We really like each space to reflect the home-owners so the pics were the perfect touch.
We were so happy with the end product and the sweet mother was soooo happy! It was worth all the hard work to see her smile! This is just one of the things that Showhome Furniture are doing to give back to the community and why we are considered as top furniture store in Calgary. At Showhome Furniture, we consider our customers as one of our family.
Watch the whole reveal here:
Remember to comment and subscribe on you video and you could be the next winner!
http://bit.ly/FarmhouseKitchenMakeover
Love the SHF FAMILY


